Introduction – How I Fell in Love with Easy Mehndi Designs
Let me tell you something from the heart — I was never the “artsy” kind of person. Drawing wasn’t my thing, and I surely didn’t believe I could ever apply mehndi. But one day, at a family wedding, I saw someone use a simple floral pattern on their hand. It wasn’t fancy. It wasn’t complicated. But it was beautiful. That’s when I realized — mehndi doesn’t always have to be complex. There’s a whole world of easy mehndi designs that are perfect for beginners, casual use, or even just a fun self-care day.
Since then, I’ve tried and tested dozens of easy patterns, some passed down from friends, others I discovered through research and experimentation. In this guide, I’ll walk you through what I’ve learned about easy mehndi designs, why they matter, and how you can start applying them today — no professional experience needed.
What is Easy Mehndi Designs?
Easy mehndi designs are simple henna patterns that anyone can apply without needing advanced skills or hours of practice. These designs use basic shapes — like circles, lines, dots, and petals — and combine them into pretty patterns for hands, fingers, or feet.
Unlike traditional bridal mehndi that can take hours, easy mehndi designs focus on speed, simplicity, and elegance. You can create something lovely in just 10–15 minutes, and you don’t need to worry about perfection.
Some common examples include:
- Small mandalas on the palm
- Finger-tip patterns with dots and vines
- Backhand chain designs
- Simple floral trails
Learn More > Easy Mehndi Designs for Kids: A Charming and Enjoyable Custom
Why Easy Mehndi Designs Matter
Here’s the thing — not everyone has hours to spend applying or waiting for mehndi to dry. Life gets busy. But that doesn’t mean we can’t enjoy the joy of henna. Easy mehndi designs make it possible for anyone, even a complete beginner, to enjoy the beauty of mehndi without stress.
It’s also great for:
- Relaxed gatherings like Eid, Diwali, or even simple family dinners.
- Kids and teens who want something fun
- DIY bridesmaids or self-made brides who prefer minimalism
- Travelers or foreigners interested in trying out cultural art
And let’s not ignore the mental benefit — applying mehndi can be super relaxing, like adult coloring. It’s creative, calming, and gives a nice break from screens.
Key Benefits of Easy Mehndi Designs
Let me break down the real advantages I’ve experienced with easy mehndi patterns:
✅ Time-Saving: Most designs take 10–30 minutes max.
✅ Beginner-Friendly: You don’t need training or experience.
✅ Cleaner Look: Simpler designs are less likely to smudge and stay looking fresh.
✅ Stylish Yet Minimal: You can still look festive without heavy, crowded designs.
✅ Kids & Teens Friendly: A fun, safe, and non-toxic option for younger hands.
✅ Budget-Friendly: You don’t need to book an artist — just a good cone and steady hands.
Common Misunderstandings or Mistakes
Now, let’s talk about a few mistakes I made in the beginning — so you don’t have to.
❌ Thinking simple means plain – Easy designs can still be full of beauty and creativity. You can create stunning designs with just dots and petals.
❌ Skipping prep – Always clean and dry your skin before applying mehndi for best results.
❌ Not practicing on paper first – This helped me a lot! Try sketching your design with a pen before using a cone.
❌ Overloading the cone – Use light pressure and small movements. A steady flow makes cleaner designs.
Real-World Examples of Easy Mehndi Designs
Let me share some of my all-time favorite mehndi patterns that I love to use. These are real designs I’ve done at home — with just a cone and 20 minutes of free time:
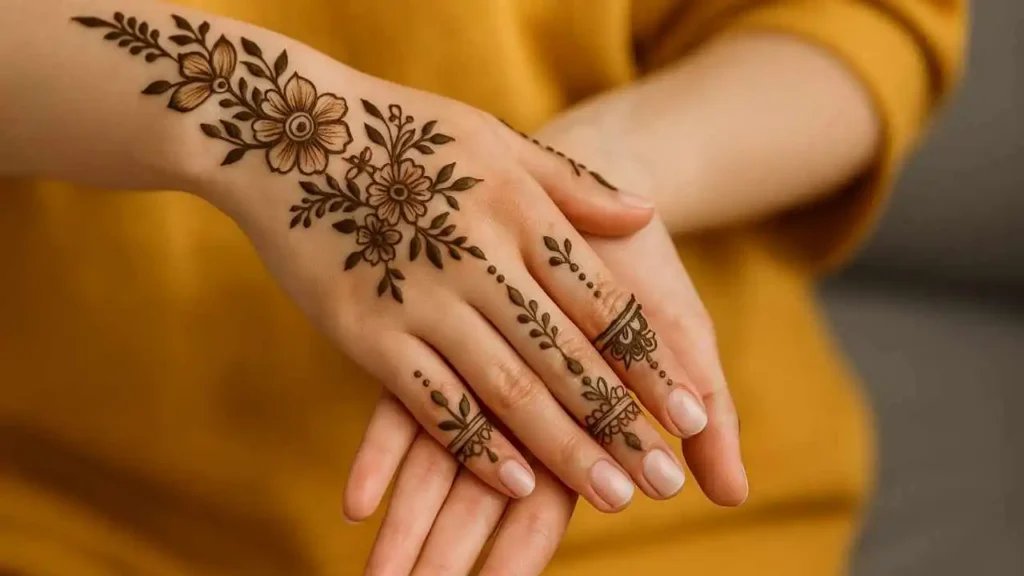
- Back Hand Leaf Trail – A line of leaves going from your wrist to your middle finger. Looks elegant and super simple.
- Mandala Dot Palm – A circle made with tiny petals and dots right in the center of your palm. Great for minimalists.
- Finger Chain Design – Tiny vines or chains going across the fingers — super trendy and clean.
- Heart Mehndi – I once did a small heart with swirls on my niece’s hand. She loved it — and I finished in 5 minutes.
How to Get Started with Easy Mehndi Designs
Starting out? Here’s what I recommend (and personally do every time):
🖊 Step 1: Practice on Paper First
Draw simple shapes — dots, swirls, curves. Then combine them into patterns.
🛒 Step 2: Get a Good Mehndi Cone
I personally use natural, chemical-free henna cones. Make sure the tip is fine for better control.
🧼 Step 3: Prep Your Skin
Clean and dry the area where you plan to apply the mehndi. No lotion or oil — it makes the design smudge.
✍️ Step 4: Start Small
Try one finger or a small palm design first. Focus on neatness, not complexity.
🕒 Step 5: Let It Dry Naturally
Don’t blow dry or rub. Let it stay for 1–2 hours (or overnight) for deep color.
🌿 Step 6: Use Lemon Sugar Spray
This helps darken the color. Combine lemon juice and sugar, then gently dab it over the design once it begins to dry.
My Final Thoughts on Easy Mehndi Designs
If you’ve ever felt scared to try mehndi because it looked too complicated, I’m here to tell you — you can do it. Everyone starts somewhere. With easy mehndi designs, you don’t need to be a pro. You just need a little creativity, a good cone, and the courage to try.
Whether you’re doing it for fun, for a friend, or for a special occasion, these designs bring instant beauty and joy. Trust me — the more you practice, the better you’ll become. Mehndi isn’t just about decoration; it’s a beautiful experience in itself. And easy designs are the best way to fall in love with it.
Frequently Asked Questions (FAQs)
Simple floral trails, dots-and-lines patterns, and finger chain designs are perfect for beginners. They’re easy to apply and still look beautiful.
Easy mehndi designs usually dry in about 30–60 minutes. But for deeper color, keep the paste on for 2–4 hours before scraping it off.
Yes, absolutely! Just make sure you use natural henna with no chemicals. Easy designs are great for little hands — fun and safe.