Let Me Tell You Why I Fell in Love with Front Hand Simple Mehndi Design
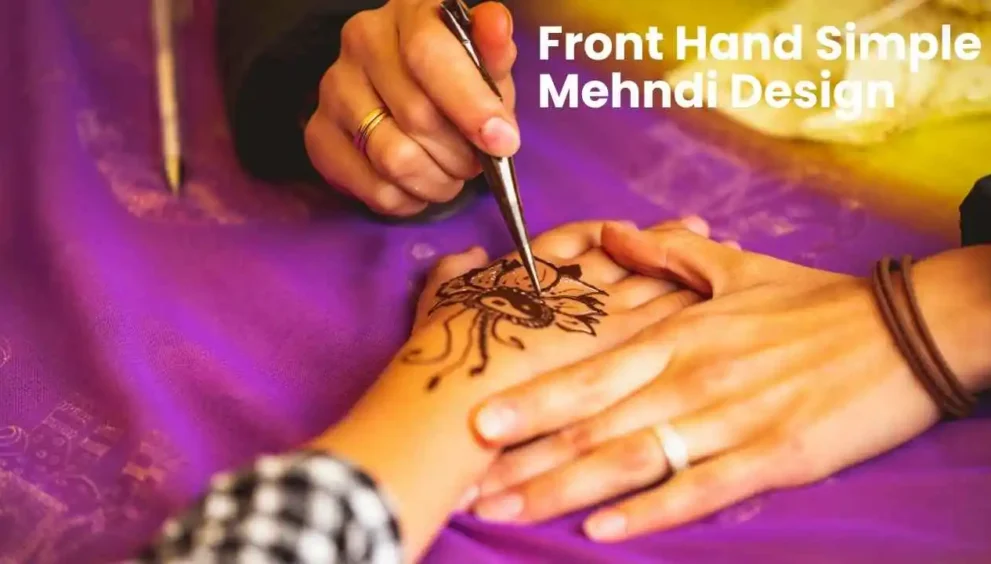
I still recall my initial try at designing a front hand easy mehndi design for a party at home. It was not extravagant — just some leafy details and plain flower motifs. But when I noticed the dark orange color the following day, I adored it. Ever since, mehndi has been a part of all my small and big events.
In this tutorial, I am going to tell you what I have discovered about front hand simple mehndi design. I am going to tell you what it is, why it is unique, and how it is easy to create it so that anyone can do it, even if you don’t have any experience. If you are preparing for a party, wedding, Eid, or just doing it for fun, I am here to assist you.
What is Front Hand Simple Mehndi Design?
A simple mehndi design front hand is just that — a lovely pattern made on the fingers and palm using henna, but in a straightforward, clean and simple manner. It has none of the heavy and elaborate designs that you find in bridal mehndi. Instead, it focuses on elegance, fine lines, and does not take much effort.
Think of it as a fresh interpretation of an old art. Such patterns can include:
- Flowering vines
- Leafy twigs
- Dotted trails
- Mandala circles
- Heart shapes
- Finger-tip contacts
The goal is to make your hand appear fine without using too much time.
Learn More > Easy Mehndi Designs That Even Beginners Can Master
Why Front Hand Simple Mehndi Design Matters
Here’s the thing — with the hectic lifestyle of today, not everyone has hours to sit and enjoy a full bridal-type mehndi. That’s where minimalist front hand designs step in. They are quick, classy, and still give you that festival or fashionable feel.
And mehndi is not just for weddings. We use it for religious celebrations such as Eid and Diwali, birthday parties, baby showers, or just because. For teens or beginners, beginning with simple patterns on the front of the hand is a confidence builder before attempting more intricate patterns.
Key Benefits of Front Hand Simple Mehndi Design
Now let’s talk about why you might want to try it:
✅ Simple to use – The easiest designs take just 10 to 20 minutes.
✅ Easy to learn – You don’t need to be an artist. Even basic patterns are pretty.
✅ Low maintenance – You don’t have to utilize thick paste or wait for hours.
✅ Trendy and modern – These styles complement casual, traditional, or even western clothing.
✅ Inexpensive – You won’t have to pay an expert — you can do it yourself in your home!
Also, since it’s used on the front of the hand (palm and fingers), the stain will be darker and longer-lasting — always a bonus!
Common Misunderstandings or Mistakes
I would like to clarify a few things that newbies find difficult with:
❌ More information = better
Incorrect. Simplicity is more beautiful. A plain spiral made of dots can be more beautiful than a cluttered, disorganized pattern.
❌ All cones are the same
They aren’t! Some henna cones are too wet or have too many chemicals. Always use natural ones—look for ones that say “chemical-free.”
❌ Apply and wash immediately
Nope. You must leave the mehndi on for a minimum of 2–3 hours. The longer it remains on your skin, the darker and deeper it will be.
Here’s my own tip: Once you strip away the dry mehndi (don’t wash it with water!), apply a lemon juice and sugar paste. This helps to lock in the color and provides you with a darker, richer stain.
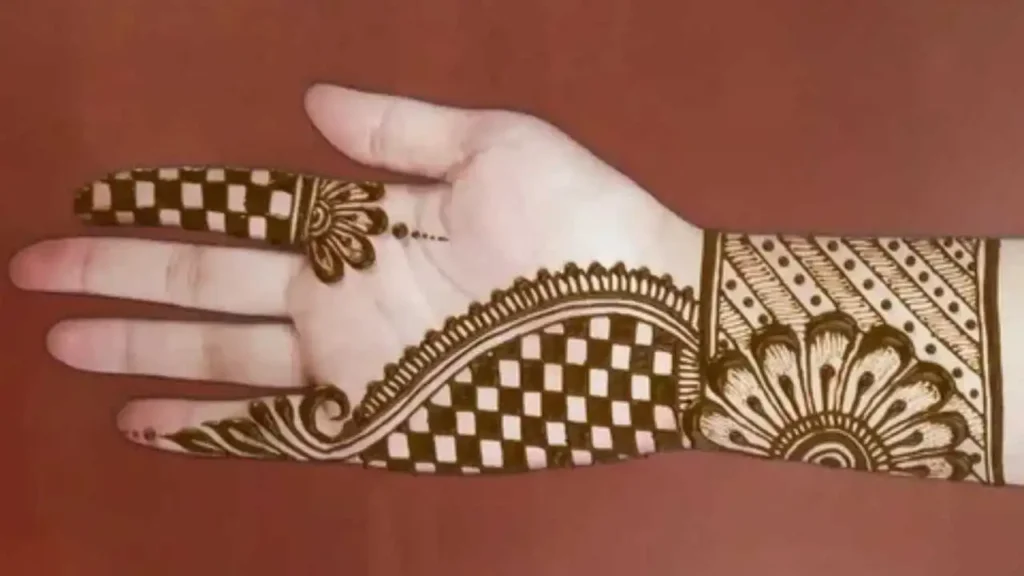
Real-World Examples of Front Hand Simple Mehndi Design
These are some of the styles that I’ve created or have friends attempt that always turn out amazing:
- The classic finger-tip trail: Just some small flowers running from the fingertip to mid-palm.
- The minimalist mandala: A tiny circular mandala in the absolute center of the palm with neat fingerwork.
- Floral cuffs: Floral design just above the wrist as a bracelet, with slender leafy stems reaching towards the palm.
- Finger-only design: A fashionable option where you merely decorate the fingers with dotted vines without decorating the palm.
You can simply find lots of ideas online or even develop your own versions based on your creativity.
How to Get Started with Front Hand Simple Mehndi Design
This is how I generally do it:
1. Ready your hand
Wash and dry your hands. No oils or creams — they stop the stain.
2. Choose your cone wisely
Use a new, freshly opened natural mehndi cone. I store mine in the refrigerator so that it doesn’t dry out.
3. Begin small
Use basic shapes such as lines, dots, hearts, and leaves. Begin drawing with gentle pressure.
4. Let it dry thoroughly
Wait for a minimum of 2–3 hours. Don’t move your hand so much. Don’t use a blow dryer — it ruins the design.
5. Aftercare
When dry, gently scrape off. Dab lemon-sugar mixture. Keep away from water for 12 hours.
Trust me, even if your initial design is terrible, don’t panic. You’ll get better over time — as I did.
My Final Thoughts on Front Hand Simple Mehndi Design
If you’ve ever believed mehndi was too complicated or for the experts just — forget about it. Basic mehndi patterns for the front hand are perfect for everyone—they’re simple, beautiful, and timeless. Whether you’re 14 or 40, a student or working mother, this is a stress-free and fun way to be more beautiful and confident.
I wear it even if I’m not attending any event — it makes me feel happy and celebratory. It’s wonderful to create your own and see the orange to reddish-brown color deepen the following day.
So grab a cone, pick a design, and give it a try. You don’t have to be a professional — you just have to make the initial move.
Frequently Asked Questions (FAQs)
Q1: A simple front hand mehndi design lasts for how many days?
It typically takes 5 to 10 days. It would simply be based on your skin type, how long you left the paste on, and whether you left it on afterwards.
Q2: Is a front hand mehndi design applicable for everyday wear or special occasions only?
Absolutely! Simple designs are perfect for everyday wear too. You don’t need to wait for a wedding or Eid to indulge in some mehndi designs.
Q3: How do I darken the color of my mehndi?
Let it dry for 2–3 hours and then apply lemon and sugar mixture. No water for 10–12 hours after removal. And warm your hands too — heat does help deepen the color.